How to Setup a HTTPS Node JS Server on Amazon EC2
Table of Contents
- Introduction
- Requirements
- Setup Simple Express.js Web Server by Using Linux EC2
- SSH into the EC2
- Test the Express.js Web App
- Use PM2 to Run Express.js App
- Test PM2 App
- Test by Using the EC2 Public IP
- Create SSL/TLS Certificate via AWS ACM
- Hosted Zones - Create New Hosted Zone
- Update Registered Domain's Name Servers
- Request AWS Certificate
- Setup AWS Application Load Balancer
- Create Target Group for Application Load Balancer
- Configure Route 53 with AWS Application Load Balancer
- Conclusion
Introduction
This blog is a guide that shows how to set up an HTTPS Node.js web server on EC2 from beginning to end. It'll include how to set up a simple Express.js web app on EC2, how to create an SSL/TLS certificate by using AWS Certificate Manager, how to set up an AWS application load balancer and create redirect rules from non-www to www, HTTP to HTTPS, and how to use Route 53 to configure a route from your custom domain to the AWS application load balancer. This blog will assume the domain name is example.com. At the end of the blog, we'd like all the http://example.com, http://www.example.com, https://example.com traffic to redirect to https://www.example.com.
Requirements
- AWS Account
- First of all, you'll need an AWS account. If you don't have one already, you can create one and get an AWS free tier for a year.
- Custom Domain
- Another requirement is a domain name if you wish to walk through this blog's steps.
- Purchase from AWS
- If you don't have a domain name but you wish to get one, you could get one from AWS Route 53 to register a domain. AWS has the ability to purchase a domain name similar to GoDaddy and any other domain hosting company. Below is the page at AWS where you can search and purchase a domain name.

- Once the new domain purchase is done, later in this blog we'll connect this domain's name server to the Route 53
NSrecord. You'll need to create a Route 53 hosted zone with the domain you just purchased.
Below is an example of a domain name's name servers:
ns-111.awsdns-11.co.uk.
ns-234.awsdns-22.net.
ns-12312asd.awsdns-33.org.
ns-123a.awsdns-44.com.
If you already have a domain name at another domain hosting company and want
to use that at AWS Route 53, most likely what you have to do is use the domain name at route53 to create a new public hosted zone. Once you create the hosted zone, you will get NS and SOA records, then you'll use the NS record and enter that at your domain host's site (e.g. GoDaddy). In this way, the name server at your hosting site will redirect the traffic to the AWS route53 account.
For example, if you have a custom domain, example.com at GoDaddy, then go to the GoDaddy DNS management and choose to enter your own nameservers for example.com, then add the above 4 NS records to GoDaddy. After entering all of the name servers from AWS Route 53 to GoDaddy, GoDaddy should be able to route the domain to your AWS Route 53. However, how to point a GoDaddy domain name to AWS Route 53 is not included in this blog.
Setup Simple Express.js Web Server by Using Linux EC2
The first step of the Route 53 configuration is done. Here, we'll try to set up the Express.js web app on the EC2 manually. Go to EC2, click Launch Instances and choose Amazon Linux 2 AMI, choose t2.micro as Instance type. At the Configure Instance Details' User data section, paste the following:
- Enter the EC2 name
- Create a key pair if you don't have one
- Leave the rest as default

Put the below code in the User Data section. We specify the node.js version to be 14 because at the time of creating this blog, that's the version which had been verified to be working.
sudo yum update -y
#!/bin/bash -ex
# output user data logs into a separate place for debugging
exec > >(tee /var/log/user-data.log|logger -t user-data -s 2>/dev/console) 2>&1 | sudo bash -
# get node into yum - with version 14.16.1
curl -fsSL https://rpm.nodesource.com/setup_14.x | sudo bash -
# install node (and npm) with yum
sudo yum install -y nodejs
# install pm2 to restart node app
npm i -g pm2@2.4.3
Click Launch Instance to create a new instance. It should be done pretty quickly.
Set Inbound Rule for Port 80
After setting up the EC2 instance, make sure the inbound rule has 80, Type is HTTP, and Source is 0.0.0.0/0.

At the next step, we'll configure the Security Group. Make sure to open HTTP, HTTPS, and SSH, because later we'll have to SSH into this instance.
Also, once you create the instance, we'll manually SSH into the instance and install the Node.js and PM2 packages.
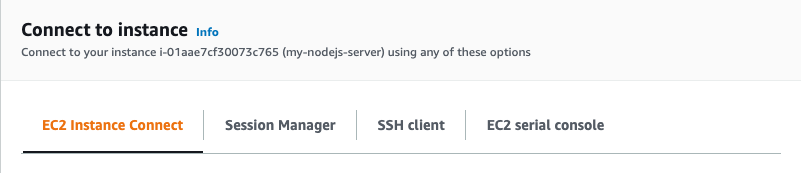
SSH into the EC2
There are a few ways to SSH into the instance as shown below. The easiest one is EC2 Instance Connect, which uses the browser.
After SSHing into the EC2, let's run the following script. Run sudo su to make everything easier. Then, we'll create an app folder and create an app.js file to start Express.js.
First, let's check the versions by running the following commands. You should see the Node version is v14.21.0, npm version is 6.14.17, and pm2 is 2.4.3.
npm -v
node -v
pm2 -v
If you see an error from the output that it cannot recognise the npm command, try running the below commands again.
sudo yum update -y
exec > >(tee /var/log/user-data.log|logger -t user-data -s 2>/dev/console) 2>&1 | sudo bash -
curl -fsSL https://rpm.nodesource.com/setup_14.x | sudo bash -
sudo yum install -y nodejs
npm i -g pm2@2.4.3
Now, once the npm or node command is confirmed running, let's run the below script to install express.
sudo su
# create app folder
mkdir -p /var/www/app && cd /var/www/app
npm init -y
npm install express --save
nano app.js
nano app.js will create a file called app.js, so next add the below code to the command window.
Add Code to app.js
The following code is a sample to start Express.js. When you type the URL, it will return the Hello World! message.
var express = require('express');
var app = express();
app.get('/', function (req, res) {
  res.send('Hello World!');
});
app.listen(80, function () {
  console.log('Example app listening on port 80!');
});
Test the Express.js Web App
Run the following command to test if the Express.js app is able to run on the local Linux instance. If you see this log from the command window 'Example app listening on port 80!', our test is done.
node app.js
Use PM2 to Run Express.js App
Using the above command can't keep Express.js running forever. When you exit the SSH window, the Node.js process closes. So we'll use PM2 here. PM2 is a production process manager for Node.js and can keep your application alive forever.
To run pm2, simply run the below command on Linux:
pm2 start app.js

Test PM2 App
Now, if the above pm2 command succeeds, the Express.js app should be running on the Amazon Linux EC2 with port 80 even if you stop the SSH session. Let's run the following command to test it out inside the Linux instance. If it returns the same message, that's good.
curl http://localhost:80
Test by Using the EC2 Public IP
Another test you should do is to copy the EC2 public instance IP to the browser to make sure you see the same Hello World! message. If it does, the EC2 part is finished. Now we can create an HTTPS certificate, a load balancer, and configure Route 53.
Create Public Hosted Zone
Here we start creating a public hosted zone and assume you have either registered a domain name from AWS or routed from another domain registrar.
Create a public hosted zone:

Verify that 2 records are created: one is NS and another is SOA.

Create SSL/TLS Certificate via AWS ACM
Now, before creating the ACM, we assume we'll use the custom domain example.com. We would also expect to see the following URLs and they should all go to the same Linux EC2 instance we created earlier.
As you can see, we'll have to create an SSL certificate and should be able to use it by https://example.com and https://www.example.com.
Here, we assume the domain is registered at AWS so we can continue with the below steps.
Hosted zones - create new hosted zone with domain name example.com
Once you create a example.com, you should see 2 records, NS and SOA type, the NS should has 4 values, probably something looks like below.
......com.
......org.
......co.uk.
......net.
Now, this 2 value are important, since we use registered our domain at AWS, we need to update above 4 value to the registered domain.
Update Registered domain's name servers
Go to the registered domains, click the Add or edit name servers, and update the name server values from the NS records' values.

name servers -> NS records Once the above steps are confirmed, we can go to ACM to create the certificate. Otherwise, you might see errors during the process.
Request AWS Certificate
Go to the AWS ACM, click Request a certificate and choose Request a public certificate. At the window for Add domain names, add *.example.com, then also add the following 2 as another name to this certificate: example.com and www.example.com. In this way, you can create one certificate that will be valid for both example.com and www.example.com.
Request a public certificate

List of domain name and validation method

Click the Create records in Route 53

At the validation method, choose DNS validation and click Create a record in Route 53, so it will create an HTTPS record in Route 53.
Success in ACM creation
We want to create these 3 domain names. Once the domains are created and new records are added to Route 53, you will see the following:

Setup AWS Application Load Balancer
Once the EC2 and SSL/TLS certificates are ready, we can set up an AWS Application load balancer. The reason we use an application load balancer is for the SSL certificate. If we want to use an AWS ACM certificate, you can't directly use it for the EC2 instance at this moment. You'll have to use either an AWS Load Balancer or AWS CloudFront. Also, we'll use the application load balancer to write redirect rules from HTTP to HTTPS and non-www to www.
Configure AWS Application Load Balancer
Go to EC2 and click the Load Balancers section, then click to create an Application Load Balancer. Enter the following in the configure load balancer window:
- Enter a name for this application load balancer
- Choose internet-facing
- Use IPv4
- Make sure it has HTTP with port 80
- Make sure it has HTTPS with port 443
- Choose your VPC and select the availability zone
At the window for selecting the default certificate, we'll choose the certificate we created in ACM. Choose "Choose a certificate from ACM" and select the certificate we created, which should be *.example.com. Leave everything else as default and choose the security group. Make sure the security group has ports open for HTTP and HTTPS because we'll have our load balancer open to the public.
In summary, below is what we just set up for the application load balancer. Note that if you didn't configure ACM correctly, you won't see any choice in the SSL/TLS certificate section.

Create Target Group for Application Load Balancer
As part of the process of creating an AWS Application Load Balancer, it will require creating a target group. You'll need to add the EC2 instance and set up health check configuration, so when we launch the application load balancer it will use the EC2 instance we created before. Here, add the EC2 instance we created earlier in this blog, and leave the health check as default.
Test Load Balancer Access
To test the load balancer setup, copy the ALB's DNS name we just created and put it in the browser. If you're able to see Hello World!, that means we have successfully set up the load balancer and it is using the EC2 instance underneath.
How to Add Rules for AWS Application Load Balancer
Here, we'll add a redirect rule for the AWS application load balancer to handle HTTP to HTTPS and non-www to www. At the end, all traffic should go to https://www.example.com.
First, choose the load balancer, click Listeners, and click View/edit rules at HTTP:80. At the rule page, choose to add a new rule, and add the following for the If area:
- Choose Host header
- Add example.com and www.example.com
At the Then area, add the following:
- Choose Redirect
- Choose HTTPS, and set the port as 443
- Choose Custom host, path, query
- Modify the Host to www.example.com
- Choose 301, as permanently moved
Click confirm and update to save your change. The above change is for the HTTP port redirect for example.com, so http://example.com and http://www.example.com will redirect to https://www.example.com. Now, let's go to the 443 HTTPS port to modify the rule.
At the HTTPS rule's If area, add the following:
- Choose Host
- Add example.com
At the Then area, add the following:
- Choose Redirect
- Choose HTTPS, and set the port as 443
- Choose Custom host, path, query
- Modify the Host to www.example.com
- Choose 301, as permanently moved
Click confirm and update to save your change. The above change is for the HTTPS port redirect for example.com, so https://example.com will redirect to https://www.example.com. That's all the redirect rules we'll need for the AWS application load balancer.
Now, the last part is we'll configure Route 53 to route traffic to the application load balancer.
Configure Route 53 with AWS Application Load Balancer
At this point, the EC2 and the application load balancer should all be running, but if you type www.example.com in your browser you will still get a "This site can't be reached" DNS error. We'll fix it here by configuring Route 53 to route to the AWS application load balancer we just created.
Let's go to AWS Route 53 and click the Hosted zones for your custom domain. In this blog we've been using example.com, so you should see 3 records in the hosted zone: NS and SOA from when you first created the hosted zone, and CNAME created by the ACM certificate.
Now, create one record as follows. This will route traffic for www.example.com to the application load balancer. After creating this record, if you type http://www.example.com or https://www.example.com, you should see the same page as when directly opening the EC2 or application load balancer.
- Record name: www.example.com
- Type: A
- Route traffic to: choose Alias
- Choose Application and Classic Load Balancer, then select the application load balancer we just configured
- Routing policy: choose Simple routing
Now, we need to create the last record. This will route traffic for example.com to the application load balancer. After creating this record, if you type http://example.com or https://example.com, you should see it redirect to https://www.example.com.
- Record name: leave as example.com
- Type: A
- Route traffic to: choose Alias
- Choose Alias to another record in this hosted zone
- Type: www.example.com
- Routing policy: choose Simple routing
That's all for setting up Route 53. Now, if you type http://example.com, http://www.example.com, or https://example.com, they will all go to https://www.example.com.
Conclusion
It requires some steps to set up HTTPS Node.js on AWS EC2 with AWS Application Load Balancer and Route 53. Next, we'll see how we can automate these steps.