How to Setup AWS Application Load Balancer
Table of Contents
- Introduction
- Setup Custom VPC
- Setup EC2
- Create Target Groups
- Create Registered Targets
- Create Application Load Balancer
- Conclusion
Introduction
This blog will show how to create an AWS Application Load Balancer with custom VPC's EC2 instances.
Setup Custom VPC
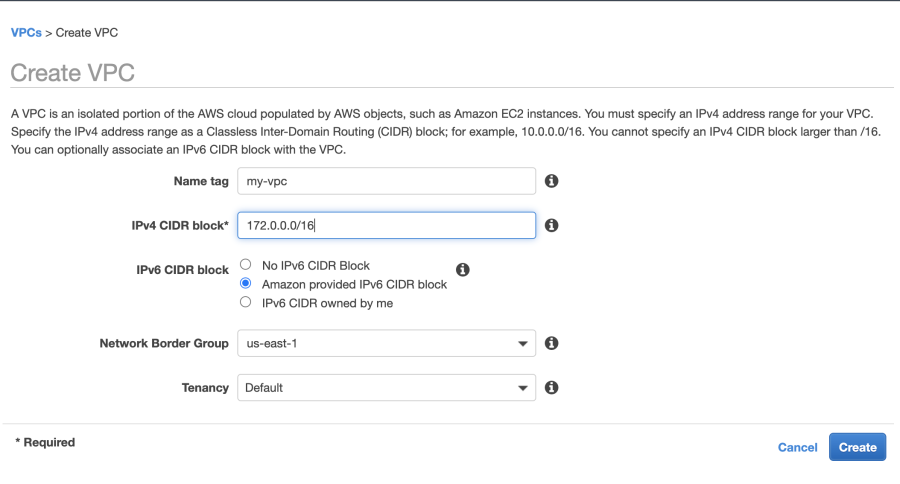
Create VPC
Go to VPC and click create VPC. Enter the VPC fields as in the example below.
-
Name tag: enter your VPC name
-
IPv4 CIDR block: enter your CIDR block IP range
-
IPv6 CIDR block: choose IPv6
-
Network Border Group
-
Tenancy: Default (you can choose if you want single-tenant, dedicated hardware or not)
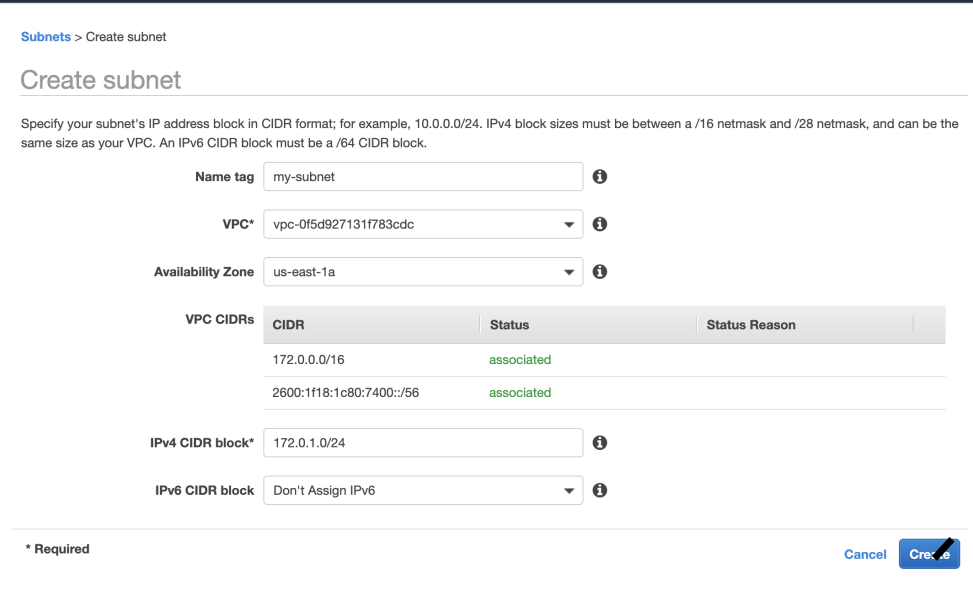
Create Subnet
We'll need 2 subnets to create the Application Load Balancer.
-
Name tag: enter any name
-
VPC: choose the VPC just created
-
Availability Zone: choose the availability zone
-
IPv4 CIDR block: 172.0.1.0/24
-
IPv6 CIDR block: don't assign IPv6 (not needed for this blog)
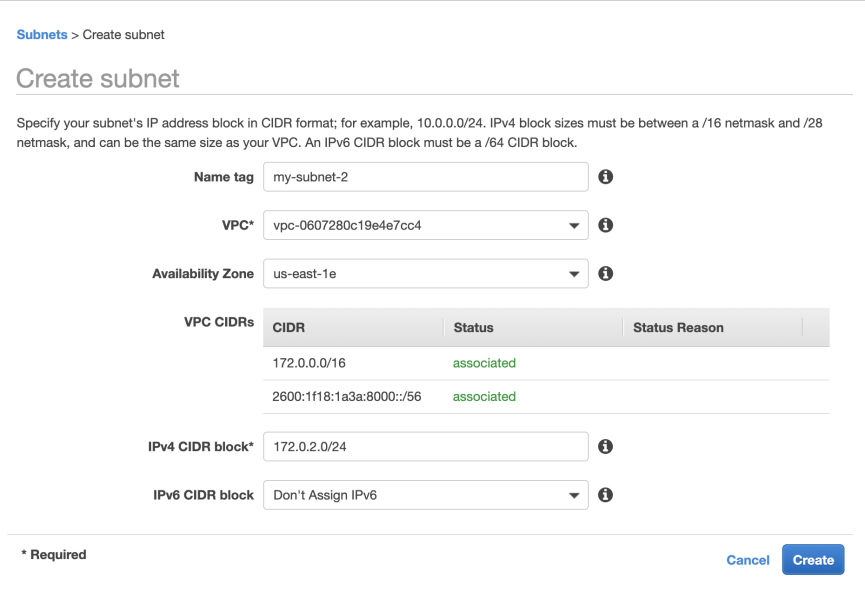
Create the second subnet. For creating an Application Load Balancer, you'll need at least 2 subnets.
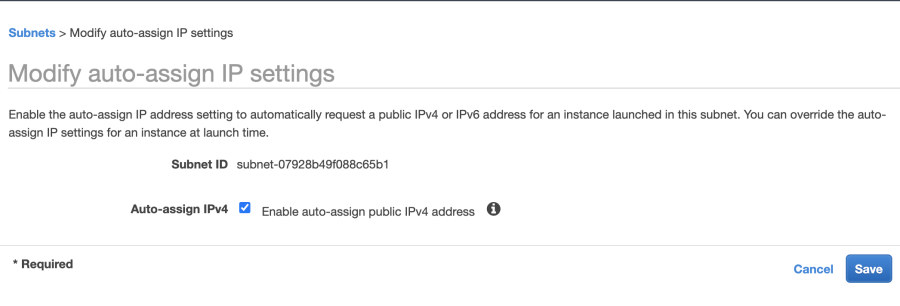
Set auto-assign IP so EC2 instances will get a public IP address.
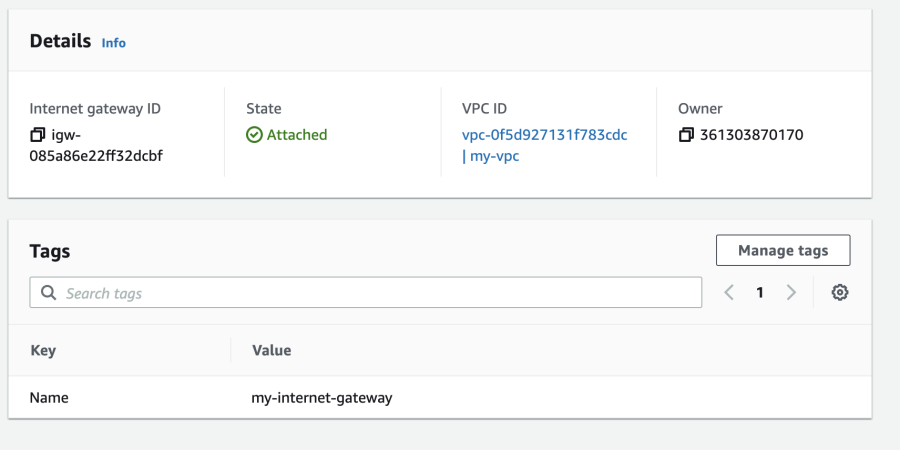
Create Internet Gateway
Create an Internet gateway and attach it to the custom VPC.
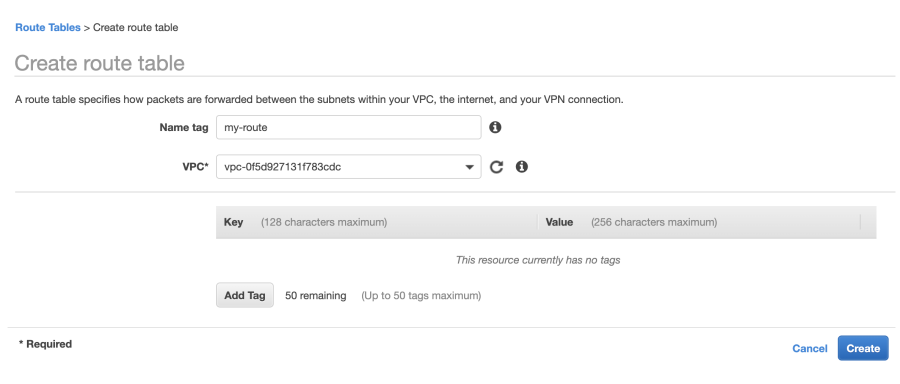
Setup Route Table
Create a route table for the subnet.
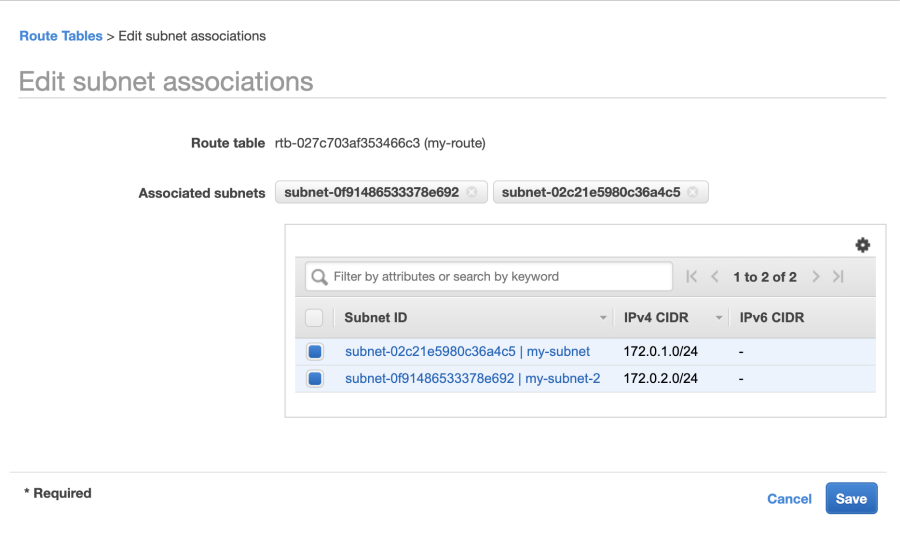
Associate the subnet to the route table.
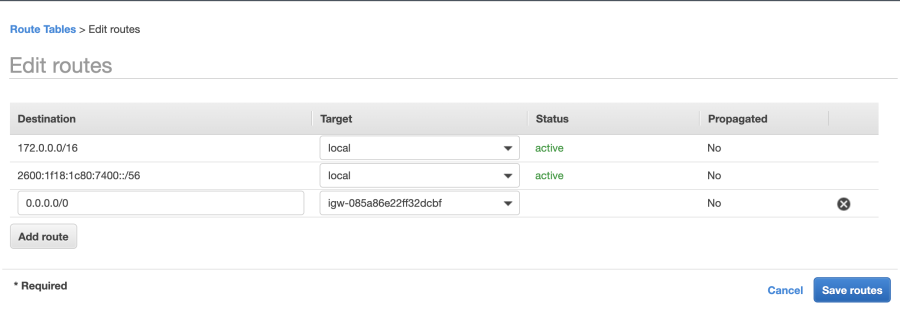
Set the route table to use the Internet gateway for internet access. Enter the routes as follows:
Destination: 0.0.0.0/0 (for IPv4 access)
Target: choose the Internet gateway
Now the VPC setup is done. We can use this custom VPC to create our EC2 instances.
Setup EC2
We'll set up EC2 with simple PHP code. Let's leave everything as default and create 2 EC2 instances.
-
Choose AMI (for example, choose Amazon AMI)
-
Choose General Purpose: t2.micro
-
Configure Instance Details
- Network: choose the VPC just created

- Subnet: choose the subnet just created

- Leave everything as default

- Put the following in the User Data field. This will start a simple PHP
site.
- ```#!/bin/bash yum update -y yum install httpd -y chkconfig httpd on service httpd start cd /var/www/html echo "hi, server-01" > index.html
  Configure Security Group

    - Add port 80 so it will be accessible from the browser.


Now, let's create another EC2 instance. Set up everything the same as the first one,
  except the User Data — change it to server-02 as follows:
#!/bin/bash yum update -y yum install httpd -y chkconfig httpd on service httpd start cd /var/www/html echo "hi, server-02" > index.html
## Create Target Groups
Let's create a target group for the Application Load Balancer. This blog only
covers setting up HTTP.
- Target type: choose Instances
- Enter any name for the target group name
- Protocol: HTTP - 80
- Choose the VPC
- Health checks
- Enter the path
- Choose available instances
- Click Create Target Group
- Creating a target group is done and associated with a list of instances.
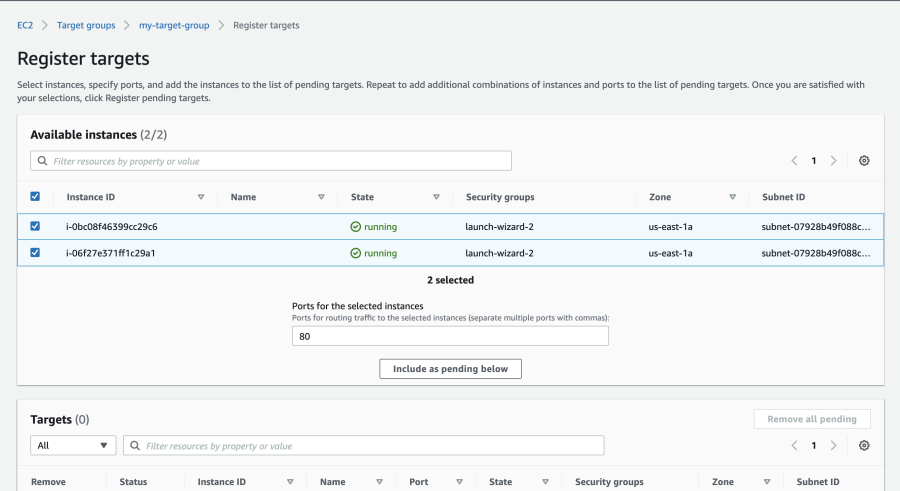
## Create Registered Targets
Click registered targets and add EC2 instances by choosing 2 EC2 instances and
clicking "Include as pending."
## Create Application Load Balancer
- Click Create Load Balancer
- Choose Application Load Balancer
- Enter a name
- Use default HTTP - 80
- Choose VPC
- Choose subnets (you'll need at least 2 subnets here)
- Choose Security Groups
- Configure Routing (select the target group created earlier)
- Now the Load Balancer is being created
- You should be able to see the application load balance between 2 instances
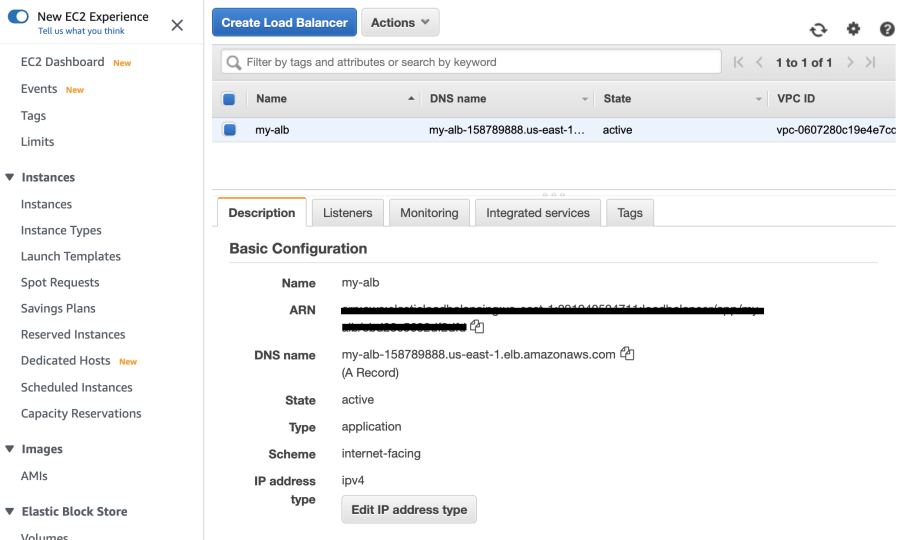
After the Application Load Balancer becomes **active**, copy the DNS
name to the browser. You should see the site alternate between the two
servers. This is how you can simply set up an Application Load Balancer
with AWS.
## Conclusion
In this blog, we walked through creating a custom VPC with subnets, Internet gateway, and route tables. We then set up two EC2 instances and configured an Application Load Balancer to distribute traffic between them. This setup provides basic high availability and load distribution for your web application.