How to Setup MongoDB on Windows Service
Table of Contents
- Introduction
- Download MongoDB
- Move the Downloaded MongoDB Folder
- Create a Command Line File to Install MongoDB as a Service
- Run the Command
- Verify Windows Service
- Connect to MongoDB
- Conclusion
Introduction
This blog shows how to simply install and use MongoDB as a Windows service.
Download MongoDB
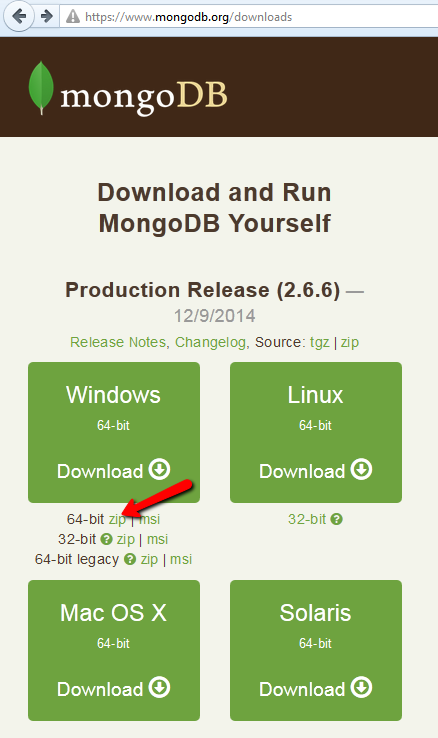
Go to the MongoDB website to download the zip file for your Windows environment. I'm using Windows 7 (64-bit), so download the Windows 64-bit zip file.
Move the Downloaded MongoDB Folder
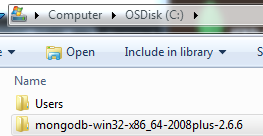
Move the downloaded MongoDB folder under the C drive.
Create a Command Line File to Install MongoDB as a Service
You can copy this blog's command line to your local machine and create a command line file. The command creates a MongoDB Windows service with some default settings.

:: this command requires the MongoDB files at the C drive.
:: the task will remove the MongoDB service, and add MongoDB to Windows service.
sc delete "MongoDB"
cd \
move C:\mongodb-win32-* C:\mongodb
md data
md data\db
md mongodb\log
echo logpath=C:\mongodb\log\mongo.log > C:\mongodb\mongod.cfg
C:\mongodb\bin\mongod.exe --config C:\mongodb\mongod.cfg --install
net start mongodb
pause
Run the Command
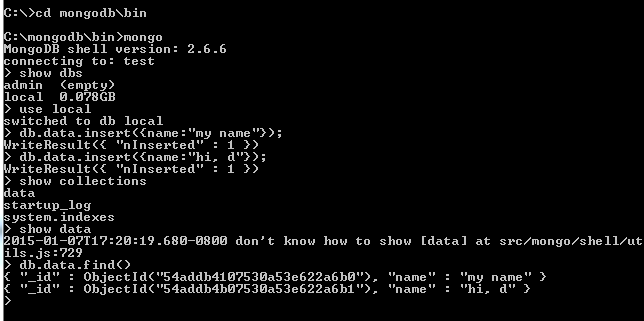
After you run the command, you should see the following screen that tells you the setup is complete.

Verify Windows Service
Also, the Windows service should have MongoDB installed.

Connect to MongoDB
Next, you can connect to your local MongoDB service and connect to a database, create a collection, insert data, and display it.
Conclusion
That's it! This blog demonstrates how to quickly set up MongoDB as a Windows service when you want to kickstart your MongoDB development on your local machine.